2015年11月18日水曜日

Audio trouble on arch linux (ALSA)

I am experiencing audio problem in my new arch linux system on my custom build PC.

I have

  • HDMI audio (built in BenQ display)
  • NVIDIA GeForce GTX950 video card
  • On board sound device (msi 970a 46g)

My problems are

  • can’t hear sound from front panel headphones
  • can’t hear sound from HDMI monitor

audio related issues on arch linux forum
https://bbs.archlinux.org/viewtopic.php?pid=1446773#p1446773
https://bbs.archlinux.org/viewtopic.php?id=186672
https://bbs.archlinux.org/viewtopic.php?id=125092

I googled and read several arch linux forum and stackoverflow pages but still have no success.
Now I will follow this how to.

Diagnosing the issue

Basically commands below to diagnose the issue returns no problem. The system recognise on board sound card and Nvidia video card.

$ aplay -l
$ aplay -L
$ ls /dev/snd
$ ls /proc/asound/
$ lsmod | grep snd

So the problem should be that my configuration is not good. Obviously, aplay -L suggests that default card is not Nvidia so I should make Nvidia card to default.

Speaker test

However I couldn’t make speaker test success. If proper speaker test fail on NVidia card, changing default sound card will not solve the problem. So I need to get sound from BenQ monitor speaker first. After reading several on the web like these (https://www.mythtv.org/wiki/Using_ALSA‘s_speaker-test_utility, ftp://download.nvidia.com/XFree86/gpu-hdmi-audio-document/gpu-hdmi-audio.html), this speaker test works finally!

$ speaker-test -Dhdmi:NVidia,1 -c 2

I noticed device 1 is my BenQ monitor because cat /proc/asound/card1/eld#0.1 says so. (I noticed this while reading this manual) Other eld#0.0 eld#0.2 eld#0.3 say there’s no monitor presented because I connected only one BenQ monitor.

Now I am sure that my monitor speaker connected to NVidia card via HDMI cable works fine.
I try make NVidia card as default sound card and make the system to output sound.

First I set default sound card by setting /etc/modprobe.d/alsa-base.conf like this.

options snd-hda-intel index=1,0

now when I reboot the system, the output of aplay -l aplay -L show now card0 is NVidia card not mobo HDA ATI SB. But I still can’t hear sound.
Next I need to set default sound device. I set /etc/asound.conf like this.

# default.pcm.card 0
default.pcm.device 7

first line may not be needed because I already set default sound card in /etc/modprobe.d/alsa-base.conf so I commented that line out.
In second line I choose pcm device 7 because cat /proc/asound/card0/eld#0.1 says second device is my BenQ monitor and aplay -l says second device is device 7.

I rebooted the system and now I can hear sound from my monitor!

Written with StackEdit.
2015年11月13日金曜日

New PC and Installing Arch Linux

New PC and Installing Arch Linux

I built my new PC (my first custom built pc) and of course I install arch linux on it.

basic build information

here is basic built information.

component spec
CPU AMD fx6300 3.5GHZ 6cores
RAM 16Gb
HDD 1TB HDD and 64GB SSD
GPU MSI GeForce GTX950
MOBO MSI970A G46

Arch Linux Installation Log

This is a log of my installation. Not a guide to installation. If you try to install arch linux, follow installation guide of arch wiki.
https://wiki.archlinux.org/index.php/Installation_guide
and beginners’ guide
https://wiki.archlinux.org/index.php/Beginners%27_guide

Preinstallation

I prepared iso media on my macbook pro.

1. Download and boot the installation medium

I will write image on flash media and boot from it. usb flash installation media

  1. Download iso (https://www.archlinux.org/download/)
    downloaded archlinux-2015.11.01-dual.iso

  2. follow installation media guide

    $ diskutil list  # check how usb is called
  3. unmount usb

    
    $ diskutil unmountDisk /dev/disk2
  4. copy iso to usb

    $ sudo dd if=archlinux-2015.11.01-dual.iso of=/dev/rdisk2 bs=1m

    without sudo I got Permission denied.
    The output was

    659+0 records in
    659+0 records out
    691011584 bytes transferred in 146.929573 secs (4703012     bytes/sec)
  5. eject usb

    $ diskutil eject
  6. boot from usb
    turned on pc and insert usb (skip bios)

2. Partitioning

Procedure is almost same as arch linux beginners’ guide suggest here.
My mobo supports UEFI so I tried to make partition UEFI/GPT setup using GNU parted.

$ fdisk -l 
# output of fdisk
# /dev/sda is ssd and /dev/sdb is hdd for me
$ parted /dev/sda
(parted) mklabel gpt
(parted) mkpart ESP fat32 1MiB 513MiB
(parted) set 1 boot on
(parted) mkpart primary ext4 513MiB 35GiB
(parted) mkpart primary ext4 35GiB 100% 
(parted) quit
$ parted /dev/sdb
(parted) mklabel gpt
(parted) mkpart primary ext4 1MiB 20GiB
(parted) mkpart primary ext4 20GiB 40GiB
(parted) mkpart primary linux-swap 40GiB 64GiB
(parted) mkpart primary ext4 64GiB 100%
(parted) quit
#partition  #Size   #type   #Mount Point
/dev/sda1   512M    FAT32   /boot
/dev/sda2   35 G    ext4    /
/dev/sda3   30 G    ext4    /usr

/dev/sdb1   20 G    ext4    /var
/dev/sdb2   20 G    ext4    /tmp
/dev/sdb3   24 G    swap    
/dev/sdb4   950G    ext4    /home

This partition scheme is not optimal or recommended. This is just a log of my scheme.
If you are interested in recommended partition scheme see arch wiki’s partitioning page.

3. format drives

$ mkfs.fat -F32 /dev/sda1 # cause this is ESP
$ mkfs.ext4 /dev/sda2 # for others ext4 is fine
$ mkswap /dev/sdb2
$ swapon /dev/sdb2

4. mount drives

First mount SSD

$ mount /dev/sda2 /mnt # /dev/sda2 is /
$ mkdir -p /mnt/boot
$ mount /dev/sda1 /mnt/boot
$ mkdir -p /mnt/usr
$ mount /dev/sda3 /mnt/usr

and mount HDD

$ mkdir -p /mnt/var
$ mount /dev/sdb1 /mnt/var
$ mkdir -p /mnt/tmp
$ mount /dev/sdb2 /mnt/tmp
$ mkdir -p /mnt/home
$ mount /dev/sdb4 /mnt/home

5. install arch linux

Before download and install check internet access

$ ping -c 3 google.com

Fortunately my ethernet was already working.
Now install arch linux.

pacstrap /mnt base base-devel

installation was fine.

6. Configuration

Now generate fstab, chroot to /mnt, set locale, time, keyboard and initramfs.

Since I separate / and /usr, a special care is needed in /etc/mkinitcpio.conf. Should read about mkinitcpio on arch wiki especially this part. I found this problem on Stackoverflow here and here. This took me two days googling and to spot.

Setting is below.

  • edit /etc/mkinitcpio.conf
    change HOOKS="base udev autodetect modconf block filesystems keyboard fsck" to HOOKS="base udev autodetect modconf block filesystems keyboard shutdown usr fsck"
  • mark /usr with a passno 0 in /etc/fstab
  • create new init image
$ arch-chroot /mnt /bin/bash
$ mkinitcpio -p linux
  • update /boot/grub.cfg (no need maybe?)
$ grub-mkconfig -o /boot/grub/grub.cfg
  • exit and unmount disks
$ exit
$ umount -R /mnt

7. Install a boot loader

For boot loader, I didn’t follow exactly the way beginners’ guide show because I felt that the way it shows for UEFI/GPT using bootctl is not so popular compared with GRUB. So I used GRUB as boot loader.

Follow the instruction on the arch wiki’s GRUB/UEFI systems.

  • install grub and bootmgr
$ pacman -S grub bootmgr
  • grub-install
$ grub-install --target=x86_64-efi --efi-directory=/boot --bootloader-id=grub --recheck
  • Don’t forget generate the main configuration file
$ grub-mkconfig -o /boot/grub/grub.cfg

8. Configure and reboot

So it’s almost done. Configure host name, network, set password. Once configuration is done, unmount all disks and reboot

Written with StackEdit.

2015年10月31日土曜日

Make D3 charting next level

Make D3 charting next level


I learned D3 for a while and somewhat confident about creating basic charts and graphs and make them interactive.
However when it become more complicated with user interactions or we need to make multiple charts to react each other (like this), it become a little bit overwhelming.
It’s mainly because when I add some interaction or animation to the d3 chart it always makes my rendering function become getting bigger and bigger so it makes me hard to keep track of each components interactions.

Using framework

I felt long time I should use some front end frame work to manage my webapp.
I first try angular and it was nice to use but I felt that using it with third party libraries is a little bit difficult and also recent move to angular2.0 is makes me down.
Then React coming to option. I leaned bit of basics by a book (React.js Essentials) and there are very nice blog posts (sxywu, nicolas hery which I read but also react.rocks, react-d3, oli.me, the binary blog) about using react with d3.

graphing each blog’s interaction (which blog referring which) might fun

after read sxywu’s blog I realised that using react is much bigger step than I think.
In her blog react is main component for rendering and event handling. It make sense because these are react’s strong points.
Rendering in react gives me component modularity and event handling with react and flux gives me one way data flow.
So where does she use d3? It’s in updating components. Because d3’s transition animation is very easy to use, beautiful effect and effective as data visualisation.
As I feel importance of transition effect and not very much expect user interaction (especially user update data, I assume user just consume data), maybe sticking to d3 is necessary and I’d love to.

Written with StackEdit.

2015年9月20日日曜日

Setting up raspberry pi 2 B+

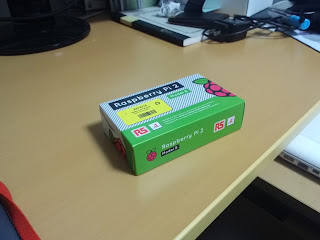
I bought raspberry pi 2 B+ at amazon.

Here are how I set up. Referenced official raspberry pi NOOBS installation video and this youtube video. (https://www.youtube.com/watch?v=qLo-0Tmmlrc)
  1. Prepare SD card
    1. Download NOOBS
    2. Download and install SDFormatter from sdcard.org (for Win/Mac)
    3. Format SD card by SDFormatter
    4. Copy NOOBS into SD card
  2. Connect all parts to raspberry pi
  3. BIOS and OS installation
When I first power on raspberry pi and installed raspbian on it, the error message "Error creating file system" showed up and the display was blacked out. I googled and found I formatted my SD card incorrectly. check here
I reformatted SD card by SDFormatter and this time checked options format size adjustment to on and named SD card "NOOBS".
Now it working!

2015年2月4日水曜日

Restoring older chromeos

Recently I failed to update pacman with
$ pacman -Syu
but it failed and partial update messed my arch system at all. So I decided reinstall arch on my chromebook.
I found when I run install.sh script that parted is not working. And this suggest that I need older version of chromeos. So I download older os on my mac and burned it on the usb and resotred my chromebook